LED-11. Make a very big size 384 X 512 RGB Matrix #1
Recently I opened a cafe specializing in souffle pancakes. The cafe's name is BlueBird and is located in 시흥(Siheung), South Korea.
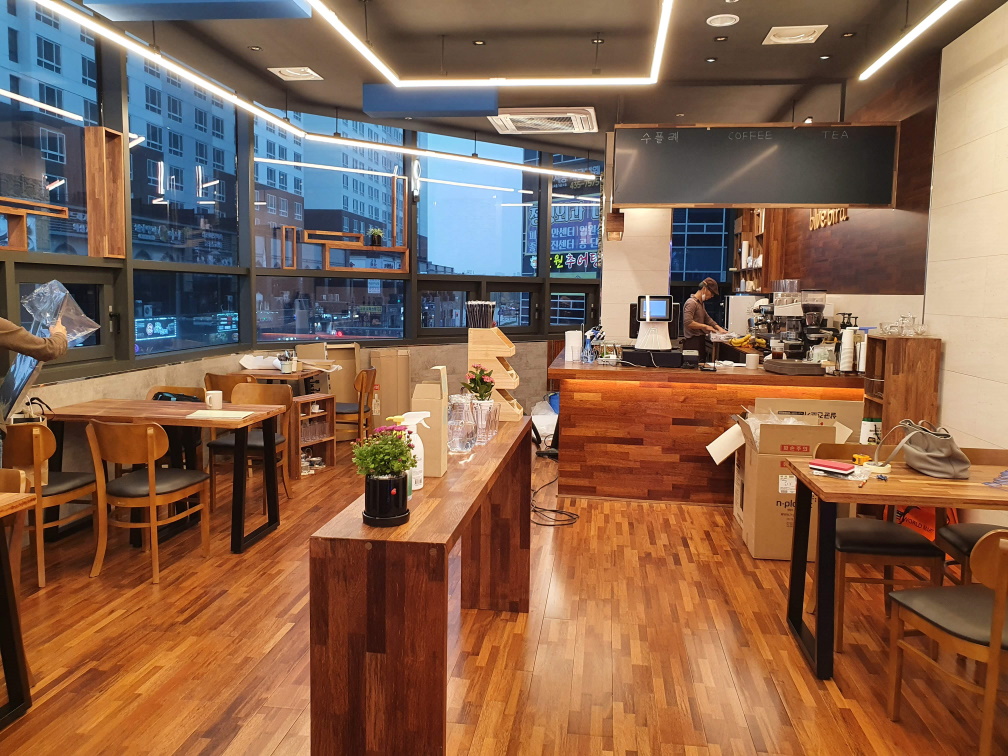
The souffle is made with egg meringue, sugar, butter and it is very fluffy.

Now, the corona virus is all over the world. That's why most people are reluctant to go out and reduce access to cafes. My souffle cafe was also affected by this, so the number of customers decreased a lot compared to when I first opened the cafe. So I decided to make a large size LED Matrix that can be installed in windows to promote the cafe. The LED matrix will be made for indoor use and the location of the installation is a window marked with a box in the following picture.

In fact, I have already made a small LED display at the entrance of the cafe. This small LED display was made using Raspberry Pi 4B and three 64x64 LED panels. In the picture below, the top display is neon sign and the bottom is LED matrix. The center black line of the LED display is invisible to the eyes of the person.

LED Matrix Design
I thought for some time to decide whether to turn LED Matrix into portrait mode or landscape mode. And I decided to do it in portrait mode. The biggest reason is that most LED billboards are in landscape mode, so I wanted to make a difference from them.
Considering size of window, LED display panels will be about 90cm wide and 120cm long.
I decided to use a P2.5 128X64 LED panel. The panel is in four sizes: 128X2.5mm wide = 320mm long and 64X2.5mm long = 160mm long. Thus, if a total of 24 panels are used using three horizontal panels and eight verticals panels, the number of panels required is 24. And the size is is 960 mm X 1280 mm.

Materials
- P 2.5 128X64 LED Pannel : 24EA
- HUB75 cables
- LED Power cables
- Raspberry Pi 4 B+(2GB) : 4EA
- Electrodragon HAT : 3EA
- Aluminium Profile and accessaries
- Power Supply : 2EA
- 5V 70A, 60A
Make the Frame
380 X 512-pixel LED display belongs to a significantly larger LED matrix. I have to make a structure that can support LED panels safely. I've been developing software for a long time, but I'm inexperienced and clumsy in creating frame structures.
Failed attempts
First, I ordered a flat iron bar made of 3T size iron. The reason for choosing a metal material is that I plan to use an M3 cylinder magnet for LED panel attachment.
But as soon as I received them, I found them too heavy to attach to the windows. And it was too hard to hole steel flat iron bars to use the cheap drill I had. So I discarded them and devised a lightweight structure.
After much consideration, I decided to build a skeleton using an aluminum profile. And I will use thin tin plates to solve the disadvantage of not attaching magnets to aluminum profiles. Since the tin plate is too thin to maintain its shape, it will be used together with plastic plates that are light and can be maintained.

<second attempt frame>
However, this frame, contrary to the previous one, the horizontal support was too weak to attach the LED pannel.
The reason is that the material of the horizontal support is plastic and thin tin plate is used and when the M3 magnet cylinder was connected to the LED panel, it was bent or broken due to its weight..

<Support with tin plate attached to plastic bar>
3rd attempt frame
The last method tried was to give up the M3 cylinder magnet. Instead, I decided to connect the bolt directly to the fixing screw hole of the LED panel.

I prepared 20X20 size aluminum profile, and I made a hole with a size of 4mm. The screw hole of the LED panel is 3mm, but a 4mm hole was drilled in consideration of the gap error that occurs during the drilling process.

<4mm hole machined aluminum profile>
And I prepared a P3 25mm long bolt and a large size washer to connect the aluminum profile to the LED panel.

<P3 25mm bolt and large size washer>
And it was assembled like this: Just connect 3 LED panels horizontally.

Very sturdy and well connected without any error between panels. The following figure shows all 24 panels connected.

Wrapping up
I went through a lot of trial and error because I had no experience in making structure, frames, but in the end I was able to produce an LED of the size I wanted.
In the next post, I will continue to write about panel-to-panel connection and power work.


댓글
댓글 쓰기